I just tried steam blocking for the first time and it was magical. I could see the seed-stitched edges of the scarf relax and flatten before my very eyes. I can't believe I waited so long to try it! My scarf now lies flat, and the design (Ravelry pattern
here) is visible when worn. Did I mention how happy I was with the result?

I've only blocked once before. I used a 100% wool yarn for the first time (my rambling thoughts on Sheep(ish) from two years ago
here), and since I thought wet blocking sounded pretty simple, I decided to try it out. There wasn't anything that I was really trying to shape, so I ended up just soaking the scarf in water and laying it out to dry. The end result didn't look any different from what I started with, and I decided that day that blocking wasn't as necessary as everyone made it out to be.
Here is an old picture of the scarf drying on a trash bag (unconventional, I know). Looking at it now, I really should have straightened out the ends and squared the whole thing up... but I guess it has its own charm this way, too.
Oops.

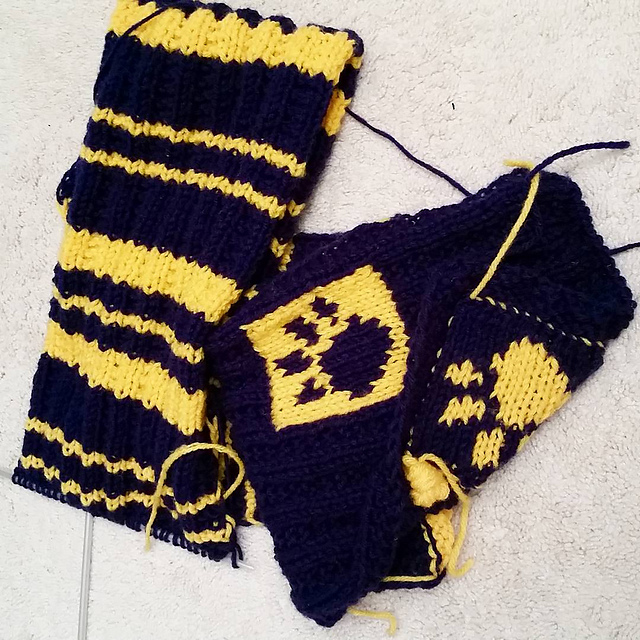
A few weeks ago, I knit a wave pattern that wasn't really visible unless you stretched the knitting out. So I knew I had to block it. I knit with Deborah Norville's Serenity Sock yarn, which is a blend of 50% merino wool, 25% bamboo, and 25% nylon. Since it was mostly wool, I decided to try wet blocking. That worked pretty well. Although the scarf shrank a bit when I unpinned it, the wave pattern is very visible now, and I managed to scallop the edges a bit.
 |
| Work in progress shot |
Then, since I had nothing else to do that day and didn't feel like knitting right then, I decided to try steam blocking.
I finished a scarf three years ago (whoa I'm getting old) when I was getting back into knitting. After learning to purl and making a couple potholders, I decided to tackle a scarf with the beautiful teal Bernat Satin my sister had gotten me for Christmas. Unfortunately, she had only gotten me one skein, so the project was put on hold as I decided I wanted to finish the project, ran to all the craft stores in the area and found no teal Bernat Satin, and finally ordered it online. I was really happy with the scarf when it was done. My tension was even, the color was beautiful, and the pattern was fantastic. However, even though the stockinette-based pattern was bordered by seed stitch, the scarf curled inward on the side. I didn't mind the texture that you can see in the wip shot, but I had to carefully lay the scarf out so that the edges were visible. And no matter how hard I tried, the beautiful pattern I'd worked so hard on was never visible when the scarf was worn. What was the point? I knew that I should block it. The pattern called for it, every knitting site praised blocking. But this yarn is acrylic. Meaning I'd have to use the iron. The iron is barely used in our house. Nobody really needs it. I started using it a lot this past winter while I was working on my t-shirt quilt, though, so I felt more confident about using it.

So finally... the blocking. I brought out the ironing board and laid a towel on it. Then I laid out the scarf as neatly as I could, right side up. Which was a mistake--more on that later. Then I set up the iron and got started! I held the iron right above the surface of the knitting in sections, staying in each spot for about five seconds and moving over the entire scarf. For the edges, I peered under the iron and held it until the edge laid completely flat, about ten seconds. I loved watching the tight, wavy border relax. Blocking also helped my cast-on edge a lot, too--the corner was sticking up.
This (terrible) picture of the wrong side taken by my dying phone shows the dramatic difference blocking made for the scarf. I couldn't lay the whole thing out on the ironing board, so after I finished one half, I laid out the other half. I was worried I would mess something up by not waiting for it to dry, but it didn't seem to make a difference. The photo shows a section that is half blocked, half unblocked. Near the top of the scarf, the seed stitch edge opens out, while near the bottom, the edge curls inward. When I was done, the whole thing lay so flat.
After I was done blocking, I carefully gathered the scarf and lay it out on a trash bag to dry (I had to clear the ironing area). Again, the movement didn't seem to affect anything.
Now, the reason I should have gone wrong side up: See those shiny areas in the picture? They're not that obvious (I hope). That's from the iron. It was leaking water from the sole plate for some reason, and though I tried to keep it off the scarf, it still got splashed. I'm not sure if the hot water actually killed the yarn, but its effects are definitely visible. Hopefully, I can fix the iron problem in the future (maybe manual steam instead of constant steam). So make sure your iron steams well!
I can't wait to block a bunch of other projects--another scarf from two or three years ago, the
basketweave blanket, the
new scarf I'm working on..