Friday, December 12, 2014
Graham Cracker Cakes
Finals are over! Whoooo! I celebrated by making a cake. In my dorm room. Which has no oven. That's right. Pinterest introduced me to the concept of graham cracker cakes, which actually don't even require the microwave. Basically, you alternate layers of graham crackers and pudding/cream cheese/Cool Whip. Then you put your "cake" in the refrigerator for 3 to 4 hours so the graham crackers soften. And then there you have it--a cake! It's actually delicious. I used chocolate pudding today, but anything goes! Jelly would probably taste good, too... I don't even know if this counts as cooking, but I'll label it as such anyway :)
Wednesday, December 10, 2014
Banana Pudding Sandwiches
Two finals down, two to go! I celebrated the halfway point by coming back from Final Number 2 and making food. Haven't looked at a textbook yet. I'll probably regret it later, but that's okay. Because I just made the most delicious snack yet (if I do say so myself)... banana pudding sandwiches! Super easy, and made from three ingredients found in Quick Zone: bananas, vanilla pudding, and Nilla wafers (or graham crackers). The microwave's not even necessary! (Though I did use it to bring out the banana flavor.) So here they are!

BANANA PUDDING SANDWICHES
Makes 40-50 sandwiches.
Ingredients:
1 medium ripe banana
3 vanilla pudding cups (like the Snack Pack kind)
1 box Nilla wafers (11 ounces, about 80 wafers)
(Feel free to adjust the banana-to-pudding ratio to your taste!)

Directions:
1. Peel and chop the banana into a microwave-safe bowl.
2. Add the pudding.
3. Microwave on high for about 1 minute.
This step is optional, but I love how this brings out the banana flavor
4. Mash the banana chunks and stir well.
5. Place pudding in refrigerator or freezer for a few minutes to cool and set.
6. Lay out half of the Nilla wafers flat-side up, then dollop pudding onto each wafer.
7. Place a wafer flat-side down on top of the pudding to make sandwiches.
8. Place sandwiches in refrigerator or freezer for a few minutes to cool and set.
9. Serve right out of the fridge. Enjoy!
*I was just short of Nilla crackers, so I had to supplement with a couple graham crackers. Use whatever you have on hand! I think these would go great with Ritz, too...
My room is now filled with the heavenly smell of banana. Natural banana. Yum!
BANANA PUDDING SANDWICHES
Makes 40-50 sandwiches.
Ingredients:
1 medium ripe banana
3 vanilla pudding cups (like the Snack Pack kind)
1 box Nilla wafers (11 ounces, about 80 wafers)
(Feel free to adjust the banana-to-pudding ratio to your taste!)
Directions:
 |
| Banana pudding |
2. Add the pudding.
3. Microwave on high for about 1 minute.
This step is optional, but I love how this brings out the banana flavor
4. Mash the banana chunks and stir well.
5. Place pudding in refrigerator or freezer for a few minutes to cool and set.
 |
| Making sandwiches |
6. Lay out half of the Nilla wafers flat-side up, then dollop pudding onto each wafer.
7. Place a wafer flat-side down on top of the pudding to make sandwiches.
8. Place sandwiches in refrigerator or freezer for a few minutes to cool and set.
9. Serve right out of the fridge. Enjoy!
*I was just short of Nilla crackers, so I had to supplement with a couple graham crackers. Use whatever you have on hand! I think these would go great with Ritz, too...
My room is now filled with the heavenly smell of banana. Natural banana. Yum!
Improvements on Betty Crocker Warm Delights: Hot Fudge Brownie
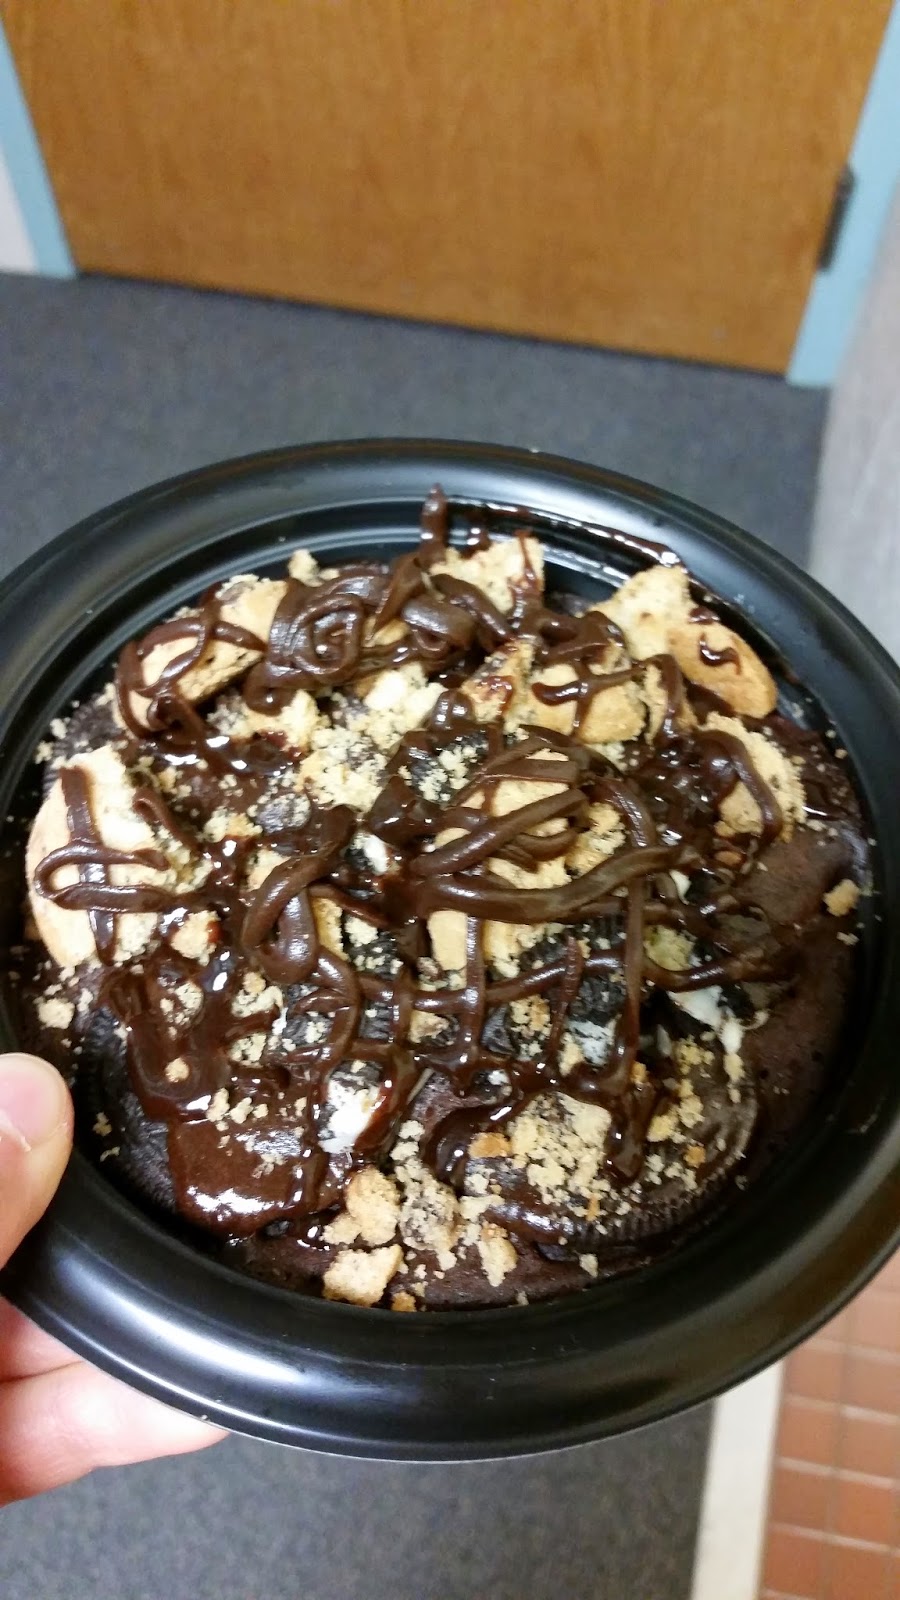
Weeks ago, in the Quick Zone, I came across a shelf of Betty Crocker Warm Delights bowls. Just for kicks, I bought a hot fudge brownie one. It sat in the cabinet until this afternoon, when I finally decided to do something with it. Because I was going to leave it in the hall for my floor-mates, I didn't want to just make the brownie, though. So this is what happened:
 |
| Betty Crocker Warm Delights--even better! |
I was inspired by slutty brownies--you know, layer of cookie dough, layer of Oreos, layer of brownie batter, baked to perfection? Well I had mini Chips Ahoy!, Oreos, and brownie mix. So why not make slutty Warm Delights?
Here's what I did:
BETTY CROCKER WARM DELIGHTS: SLUTTY HOT FUDGE BROWNIE
Ingredients:
1 package Betty Crocker Warm Delights, Hot Fudge Brownie*
Water (for the brownie)
10 mini Chips Ahoy! (or any chocolate chip cookie... or any cookie, really...)
6 Oreos
Directions:
1. In a separate bowl, prepare brownie mix according to package directions. (Mix 1 tablespoon and 1 teaspoon of water with brownie mix.) Or you could use the bowl provided, if you're not too concerned with a chocolate chip cookie bottom :)
2. Place 7 Chips Ahoy! cookies in the bottom of the Warm Delights bowl.
3. Place 5 Oreos on top of the Chips Ahoy! cookies.
4. Pour brownie batter into bowl. Use a spoon to spread it around evenly and make sure it gets into the gaps between the cookies.
5. Cook brownie according to package directions (Microwave on high for about 45 seconds).
6. Remove brownie from microwave and top with remaining cookies, crushed, and hot fudge topping.
7. If you don't plan to cut the brownie, let it sit for 5 minutes (at least, that's what the package says), then enjoy! If you do plan to cut the brownie, let it cool before you do so. I sliced the brownie into 9 pieces, which were easy to remove from the bowl.
Note: There was just enough brownie batter to cover the cookies. You may want to try mixing crushed cookies directly into the batter, or just using one layer of cookies. You can also use candy bars, chocolate chips, or nuts in place of (or in addition to) the cookies!
Marshmallow Treats
I actually first started to think about making sweet treats in my dorm because I wanted tosend some to my boyfriend. He'd left a couple of plastic food containers here (because he didn't have enough room to bring them back), and I thought it'd be great to send them back--with food inside. I wasn't going to tell him until the day he was supposed to receive the package, but he ended up receiving it a day earlier than I expected, so it was a true surprise! He loved it!
So,continuing with the stories of my food forays (see these cookie truffles!)... another sweet treat made with marshmallows and whatever crunchies you have on hand! Everybody's heard of Rice Krispies Treats, but, as a Pinterest search will show, there are so many variations!
Basically, to 3 tablespoons of butter (or vegetable oil, as I had and used) and a 10-ounce package of marshmallows (or a 7-ounce jar of marshmallow fluff), add 6 to 7 cups of crunch--Rice Krispies, other cereals, crushed cookies, crushed pretzels... You can also add stuff into the marshmallow (just stir it in after the marshmallows melt), like peanut butter or Nutella!
Here are some of the combos I've done:
3 tablespoons vegetable oil
10 oz. marshmallows
6 cups Frosted Flakes and crushed Oreos
(These turned out a little too sweet for my taste.)
3 tablespoons vegetable oil
7 oz. marshmallow fluff
1/2 cup peanut butter
6 1/2 cups crushed sourdough pretzels
These were delicious, but didn't hold together as well as I'd hoped. Although I did use 4 tablespoons of vegetable oil by accident... oops :)
Cookie Truffles
As the end of the semester draws to a close, I realize that I have way too many Dining Dollars. It's part of the meal plan here. So, because I want to get my money's worth of food, I needed to spend about $300 in two weeks. I bought lots of cookies and chips. But to be honest, I don't really want to eat most of it. My dorm floor has this table in the hall where people sometimes put treats to share--brownies from home, a bag of candies, whatever. So I thought... why not contribute to this table? Better yet, why not convert boring snacks into exciting treats? Since it's finals week, I have nothing to do except study. Which means I have plenty of time to make food!
After browsing Pinterest for a long time, I tried some of the ideas I saw, to great appreciation from my floor-mates. The next few posts will be about food I've made with a microwave and a fridge. And ingredients from the Quick Zone. These aren't necessarily quick... I'm just trying to use up ingredients :)
First up... truffles! Not the mushrooms, not the traditional chocolate kind (though there's plenty of chocolate in these), but the cookie kind! I've made three variations so far, and I have three more packages of cream cheese ready in the fridge. I'm planning on making lots more once I'm home to spread holiday cheer to friends!
The concept is pretty easy... Grab some cookies, crush 'em into crumbs, combine with cream cheese, form balls, and smother in chocolate. Since I have the pictures for my Nutella truffles, I'll go into detail with them.

After browsing Pinterest for a long time, I tried some of the ideas I saw, to great appreciation from my floor-mates. The next few posts will be about food I've made with a microwave and a fridge. And ingredients from the Quick Zone. These aren't necessarily quick... I'm just trying to use up ingredients :)
First up... truffles! Not the mushrooms, not the traditional chocolate kind (though there's plenty of chocolate in these), but the cookie kind! I've made three variations so far, and I have three more packages of cream cheese ready in the fridge. I'm planning on making lots more once I'm home to spread holiday cheer to friends!
 |
| Milk chocolate-covered Nutella truffles |
Ingredients:
8 oz, cream cheese (1 package)
13 oz. Nutella (1 of the small jars)
14.4 oz. graham crackers (a box of Honey Maid's, 27 crackers, about 4 cups when crushed finely)
About 8 oz. chocolate, any way you can get it* (see Step 6 below for more details)
Directions:
 |
| Graham cracker crumbs |
1. Crush graham crackers into crumbs.
I don't have a food processor, so I put the crackers in a gallon Ziploc bag, squeezed the air out, and used my hands. To go true college-style, use the spine of your least favorite textbook. It was quite a good way to de-stress before finals ;)
 |
| Truffle dough |
2. Add cream cheese and Nutella; mix until well combined.
I tried to use a bowl, then realized my cereal bowl wasn't going to cut it size-wise. So I poured everything back into the Ziploc bag and mushed it around. I've never tried using a bowl, so I can't say if using the baggie was easier, but it definitely wasn't hard--pretty simple, actually.
3. Place dough in refrigerator to harden.
Or the freezer, if you're impatient :)
 |
| Truffle balls |
4. Using a spoon, form compact balls of dough. (I ended up with about 45)
If you have some sort of round ice-cream scoop, that's fantastic. For the ones shown here, I used a spoon to compact the dough into the bottom of a tiny plastic cup. In my later truffles, I just used my hands to shape the dough into quasi-spherical shapes with the Ziploc bag, which was much less time-consuming, and the results were just as good.
5. Return to refrigerator (or freezer) to harden while you melt the chocolate.
6. Melt the chocolate!
Unwrap your chocolates and place them in a bowl, breaking the bars into smaller pieces. Set your microwave on half-power and microwave for short intervals, stirring in between. (I started off with 30, then decreased to 15 and 10-second intervals.) The idea is to go slowly because chocolate can burn easily if you're not careful. Also, make sure to keep water away from your chocolate so it doesn't form lumps. (If this happens, add a little vegetable oil and stir.)
*Because I didn't have enough of any one kind of chocolate, I separated the different kinds I had (though I didn't wash my bowl in between). I used Hershey's bars (milk and dark), Hershey's Kisses, Reese's peanut butter cups, M&M's, and York peppermint patties. Some reflections... I do not recommend York peppermint patties. Something about the mint (the sugar, maybe?) makes the chocolate gummy when it's melted and tough to chew when it re-hardens. For the M&M's, I crushed the candy shells with my spoon as I stirred the melted chocolate. The resulting coating still has the crunch, which I enjoyed. The Reese's cups coating was softer (even when cooled) than the chocolates because of the peanut butter, but I loved it just the same. The regular milk and dark chocolate turned out the way you'd expect.
7. Remove the truffle balls from the fridge and start dipping!
I dropped them in one at a time (my cereal bowl couldn't take much more anyway). Then, using a spoon and a fork, I rolled it around in the chocolate, then let it sit on the fork to let the excess chocolate drip off. Note: The coating is actually pretty thick. Depending on your preferences, you may want to add a tiny bit of vegetable oil to the chocolate while you melt it for a thinner coat. This makes it easier for the truffle's flavor to come through the chocolate (especially if you use peanut butter cups).
8. Place chocolate-dipped balls on waxed paper (or other nonstick surface), then into the fridge to set.
9. When the chocolate has cooled and hardened, enjoy!
 |
| After a bite...mmm! |
 |
| Dark chocolate coating on the left; Reese's coating on the right |
 |
| Dark chocolate- and M&M-coated truffles |
There are tons of variations on this--just check out Pinterest! I've also done the following:
11.5 oz. Keebler Fudge Stripes Cookies (1 small package) with 4 oz. cream cheese
11.75 oz. Chunky Chips Ahoy! cookies (1 package) with 4 oz. cream cheese
(Warning (or encouragement, if you needed more): These are very chocolatey!)
And am excited to try the following:
8 oz. ginger wafers with 4 oz. cream cheese
1 package Nilla wafers with 8 oz. cream cheese and 1/3 cup of mashed banana
Update 1/12/15: All the above variations are great! Also, try
16 oz. Nutter Butters with 8 oz. cream cheese
11 oz. Lorna Doone cookies in place of Nilla Wafers in the banana version above
Add candy chunks (KitKats, Crunch bars, Reese's) to the "dough" or form balls around candies like Whoppers or M&Ms
For a healthier option, substitute pudding for the cream cheese! I used 2 snack cups, or 7 ounces, but the dough was hard to shape. (However, I was impatient and only left the dough in the freezer for an hour or so.) I ended up spooning the dough directly into the chocolate, which worked. This results in a softer center that is delicious in its own right! I also want to try using Greek yogurt.
What are your guys' favorite combinations?
Wednesday, December 3, 2014
Brioche Infinity Scarf
Last night, I posted a picture of my brioche infinity scarf on Facebook, and it got a lot of positive feedback, so I thought I'd share the exact pattern. If you are familiar with brioche stitch, this is a quick and easy knit. If not, brioche is pretty repetitive and easy to pick up, so there's no better time to learn!

BRIOCHE INFINITY SCARF
*Note: You can seam or graft the ends together. I haven't found a good way to graft brioche, so either way, the join will be visible. If you wear the scarf with the join in the back, it's completely unnoticeable, so neither grafting or seaming is better than the other. (If you know of a way to graft brioche, let me know!)
Yarn: Red Heart Super Saver Solids, Cherry Red (1 skein)
Needles: US Size #11
Gauge: 15 sts x 7.5 rows = 4" x 4" in pattern (In brioche stitch, one "V" counts as one row and is formed by working back and forth, so one counted row is actually two rows worked back and forth.)
Finished dimensions: about 9" x 5'
Brioche Pattern:
Row 1 (WS): sl1wyib, k2tog, *sl1wyif, yo, k2tog. Rep from * to last st. k1.
Row 2: sl1wyib, *sl1wyif, yo, k2tog. Rep from * to last 2 sts. sl1wyif, yo, k1.
Scarf:
Cast on 29 sts loosely. Use a provisional cast-on if you plan to graft the two ends of the scarf together. (You can also seam the ends together.)
Row 1 (RS): sl1wyib. *sl1wyif, yo, k1. Rep from * to end of row.
Now work in Brioche Pattern until there is just enough yarn to graft or bind off and seam the two edges together. I ended up with about 5 feet of scarf.
Graft to the provisional cast on. Alternatively, bind off and seam to the cast-on edge.
Weave in ends.
This pattern is for personal use only. The finished item may not be sold for profit. Please acknowledge the author. Thank you!
Tuesday, December 2, 2014
Cooking in the Dorm
My first semester at college is nearly over. I can't believe it. Overall, I think I've adjusted well, but I miss home-cooked food. Oddly, I've developed a bit of an obsession for cooking now. Since I'm only allowed a refrigerator and a 600-watt microwave, I can't do much, but it forces me to become inventive. My family actually did not have a microwave for most of my childhood, so I'm still not completely comfortable with the do's and don't's of microwaving. However, endless Google searches and Pinterest-browing sessions have given me ideas with the limited ingredients I can buy with my meal plan, and I have yet to cause a mess. Yay!
(Side note: I just discovered Pinterest a couple of weeks ago. It is addicting.)
Anyway, I thought I'd share some things I've done with the microwave.
Fruits--Chop an apple or banana into a bowl, or just throw some berries in there and microwave. Add raisins if you can find them. Goes great with plain yogurt (though some may prefer added sweetness). If you microwave them for a bit longer, berries become jam-like when they cool. Careful: blueberries pop and splatter, so cover your bowl (I use damp paper towels).
Eggs--Scramble 'em up and pop them in on medium-high heat for about 2 minutes. Add some milk for added fluff. You can add any combination of vegetables (I get mine from the salad bar)--mushrooms, peppers, tomatoes, spinach, onions, etc. and make an omelette!
Salad--I like my vegetables cooked. Microwave a salad with a little water. Make sure to prick vegetables such as cherry tomatoes with a fork.
1 egg + 1 mashed banana--It's good. Just try it. Make sure to mash the banana very well. Microwave on medium-high heat for 2 to 3 minutes. Add some oats (about 1/4 cup) if desired. Or other fruits. Or some chocolate chips. Whatever you want!
This brownie made from hot chocolate mix. She has so many variations, if you have hot cocoa packets, you're bound to have the other ingredients on hand!
French toast--Scramble an egg, add some milk (optional), and add a couple slices of bread torn into chunks. Stir it around and make sure the bread soaks up the egg. Microwave on medium-high heat for about two minutes. Before tearing up the bread, you can make a sandwich (jelly, Nutella, peanut butter, etc.) to add some sweetness and flavor. You can also add fruits to the bowl before you microwave. I've also tried soaking a PB&J sandwich in milk, then microwaving it on the plate, which works, too! (But the plate's a pain to clean... grease liberally with vegetable oil.)
Here are some more time-consuming treats. That doesn't mean difficult, though--they're made with only a few ingredients--and they're well worth the wait!
Cookie truffles: cream cheese, cookie crumbs, chocolate candies (optional)
Marshmallow treats: marshmallows, vegetable oil, crunchy pieces
Slutty Brownie: Betty Crocker Warm Delights Hot Fudge Brownie, Chips Ahoy!, Oreos
Banana pudding sandwiches: banana, vanilla pudding, Nilla wafers (or Lorna Doone cookies)
Graham cracker cakes: graham crackers, pudding/cream cheese/Cool Whip/jelly/etc.
Subscribe to:
Posts (Atom)